I recently wrote a blog post about running all tests in Salesforce before a deployment. Now I’m going to show you how I pull those test results out of Salesforce and into a spreadsheet for documentation and visibility purposes.
You ran all of your tests, you have 63 failures, and, let’s face it, the Apex Test History view isn’t very user friendly. At least not in my opinion. What are you to do? Pull those test results out of Salesforce. ApexTestResult is an object that Salesforce allows you to run SOQL queries on. I like to use Workbench to query those results and download them into a .csv file. Then, I can open that up as a spreadsheet later on to share with my team.
Why do I do this? I like visibility into what the failures were, when they took place, and what I did to fix them. This gives me insight into how we can reuse this information in the future. Pulling these test results into a spreadsheet allows me to group the errors and see similarities. For example, a new validation rule causing 6 of my test classes to fail because we’re missing a field value. (For more on that topic, read this blog post from Garry on validation rules notoriously breaking stuff.)
Having a spreadsheet also helps if I rerun the tests at a later time. I can add a new sheet and instantly see if more commonalities are present. Also provided: information on what is causing a failure in any new tests. Pulling test results out of Salesforce and into a spreadsheet gives us an easy-to-read timeline of unit test history.
Steps to Get Your Test Results Out of Salesforce Using Workbench
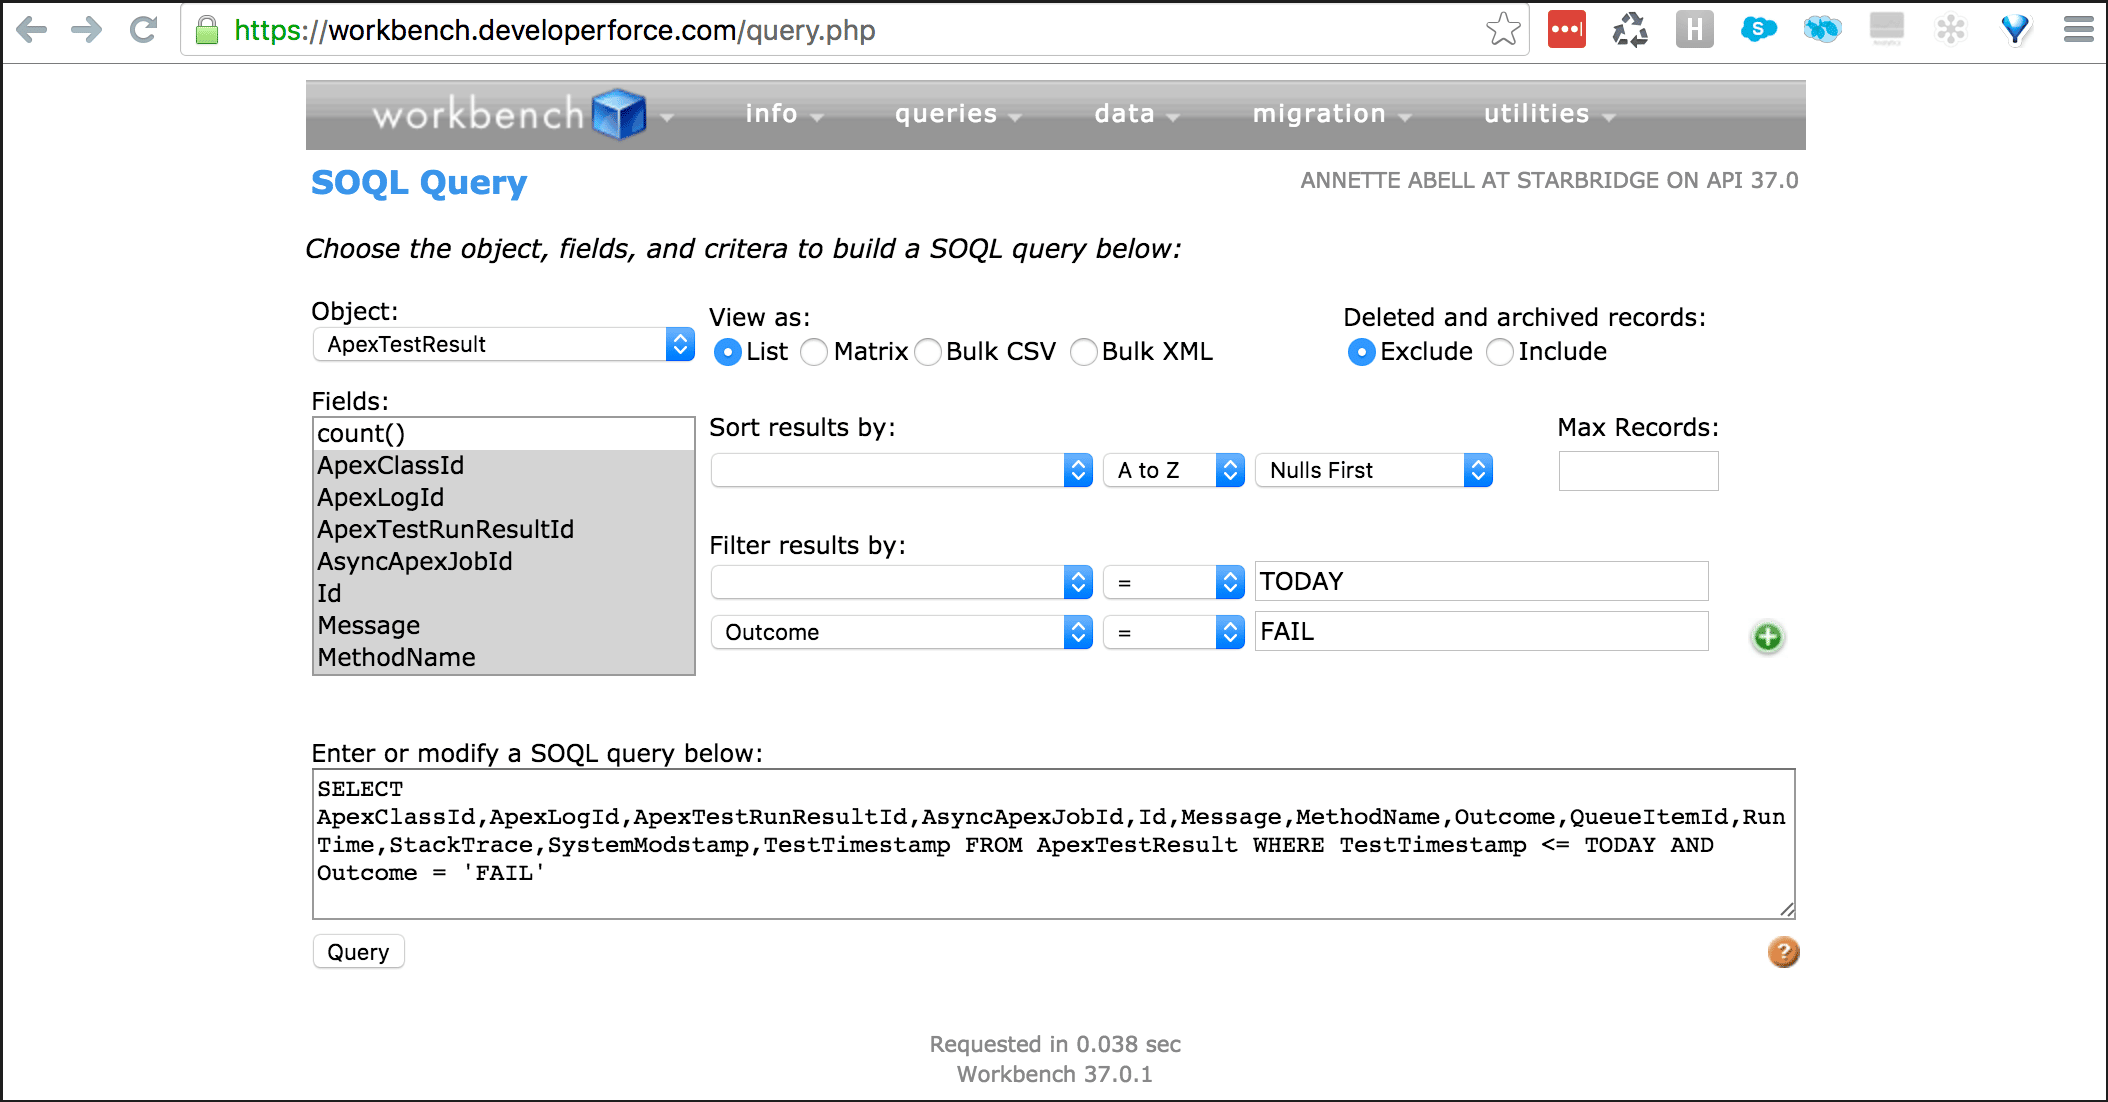
1) Log in to Workbench. Choose your environment and API Version.

2) Navigate to SOQL Query.
3) For Object, choose “ApexTestResult.”
4) Choose the fields you want to pull in. (I generally choose everything except count(), as that is an aggregate field.)
5) You can opt to pull all results if you’ve recently cleared your test results before running, or you can filter to a certain date or only pull the failures. Below are some examples.
Filter By: TestTimeStamp = TODAY
Filter By: Outcome = “Fail” OR “CompileFail”
6) You can also sort the records and limit the number using the remaining available options.
7) Finally, you can View As “List” to see the results in the web page. Once you’re ready to download, you can View As “Bulk CSV” and query.

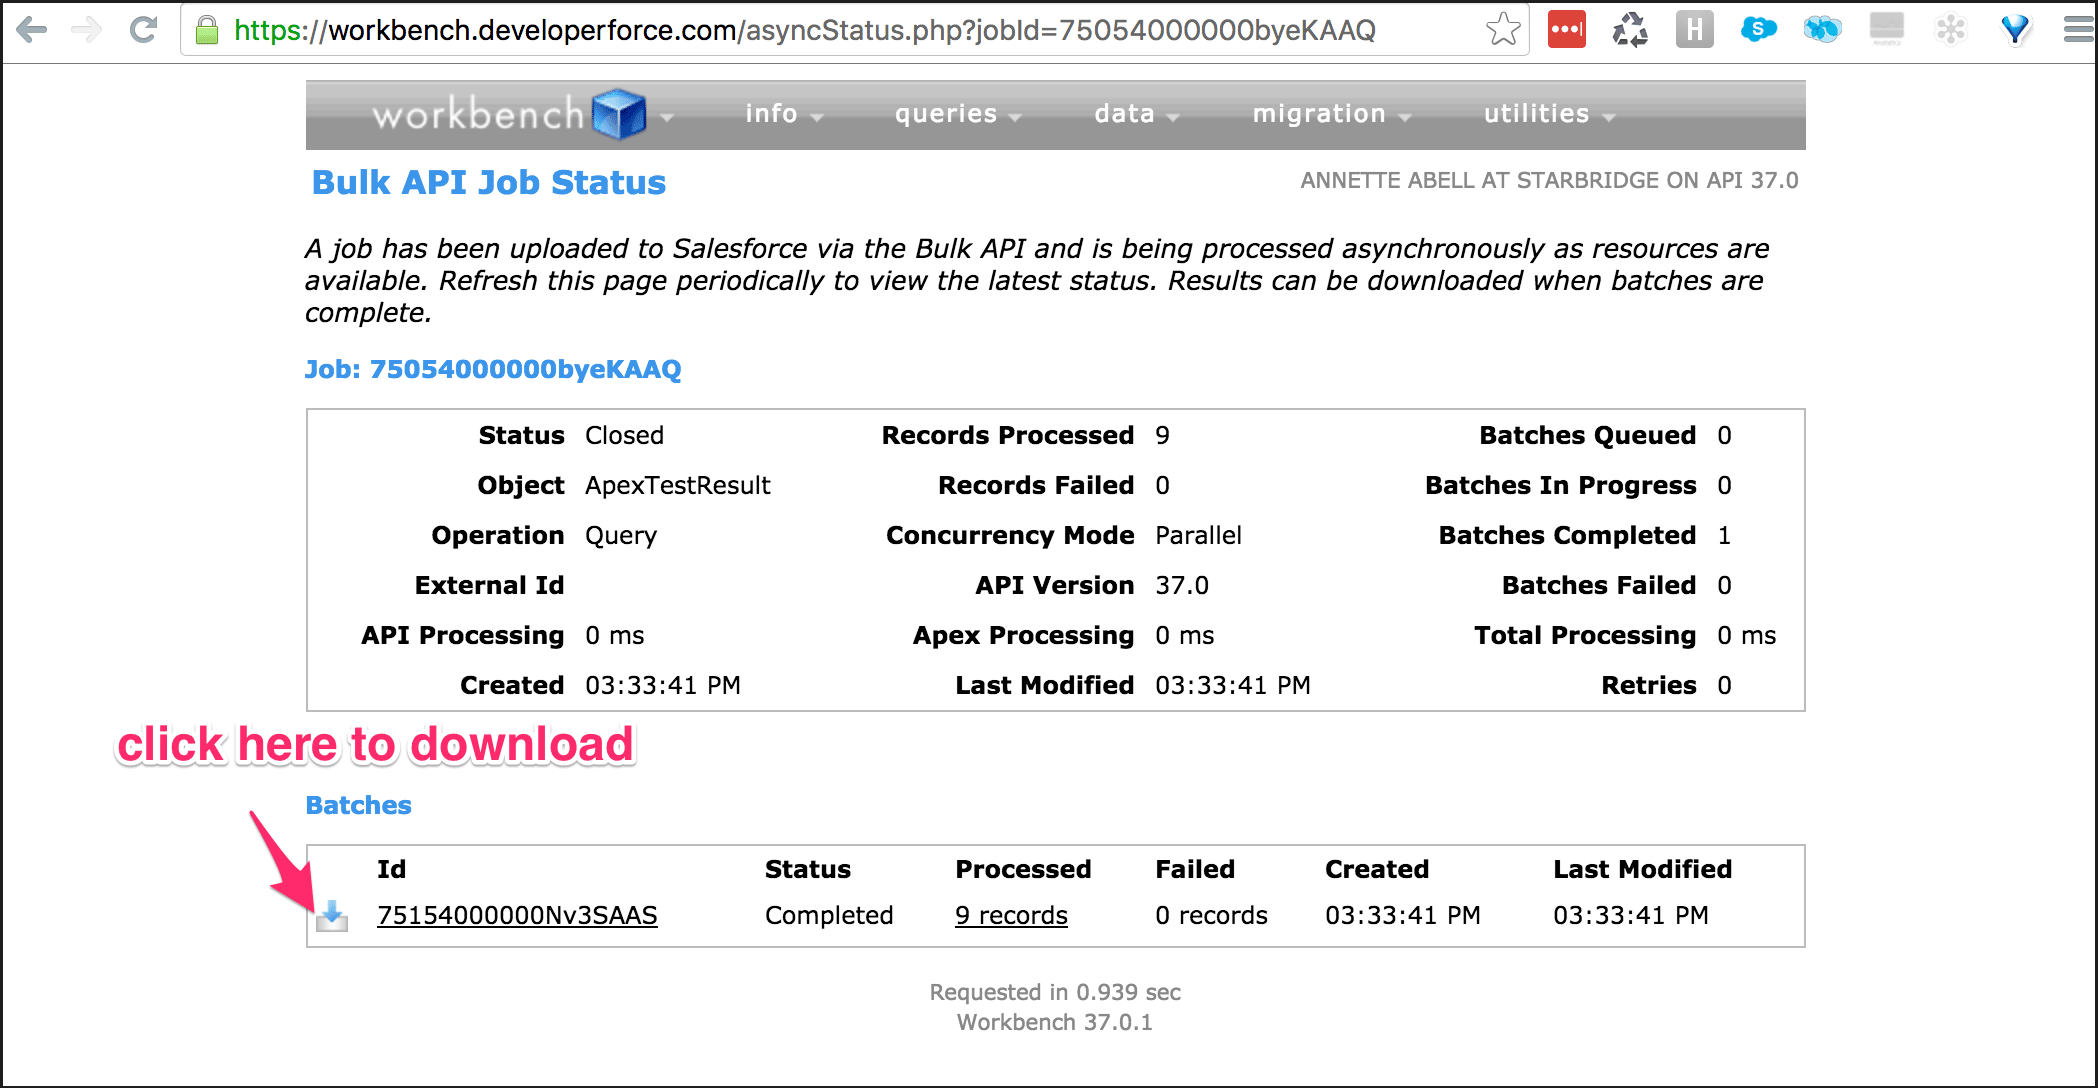
When the query is successful, you can download the results and open as a spreadsheet.

There ya go! You know everything you need to in order to pull the test results out of Salesforce. Now you can download, share, and review the results even after they’ve been deleted from Salesforce.
We’ve been sharing lots of tips for using Workbench on the blog lately. Check out Tom’s latest post on Object Browser or Lindsey’s post on pulling a metadata backup using Workbench. If you have your own tips, leave a comment below or hit us up on Twitter: @redargyledotcom.


