Part of being an expert in the Salesforce platform involves knowing when to use hardcore (imperative) code or point-and-click (declarative) code in administration and development. In order to determine your course of action, you must first completely understand the problem that needs to be solved. Next, you have to take a good look at the tools Salesforce provides. If Salesforce provides a feature that allows you to avoid writing code, you’ll improve efficiency and save you and your company some significant time. This is often referred to as the “code cliff”–in other words, how far you can go without having to jump off and write code. Salesforce has continually been adding features to push the code cliff further and further back. This post outlines a few of them.
Imagine that you’re still using code, when suddenly a new option makes it so that all you have to do is click a button and let Salesforce do the leg work. That reality exists…with a few caveats. This brings us to the phrase “click before code.” Using declarative, point-and-click syntax before hardcore code saves your brain and time. Let’s walk through some of the factors that will come into play as you decide whether to pursue imperative or declarative code in future development.
Making A Workflow Work For You
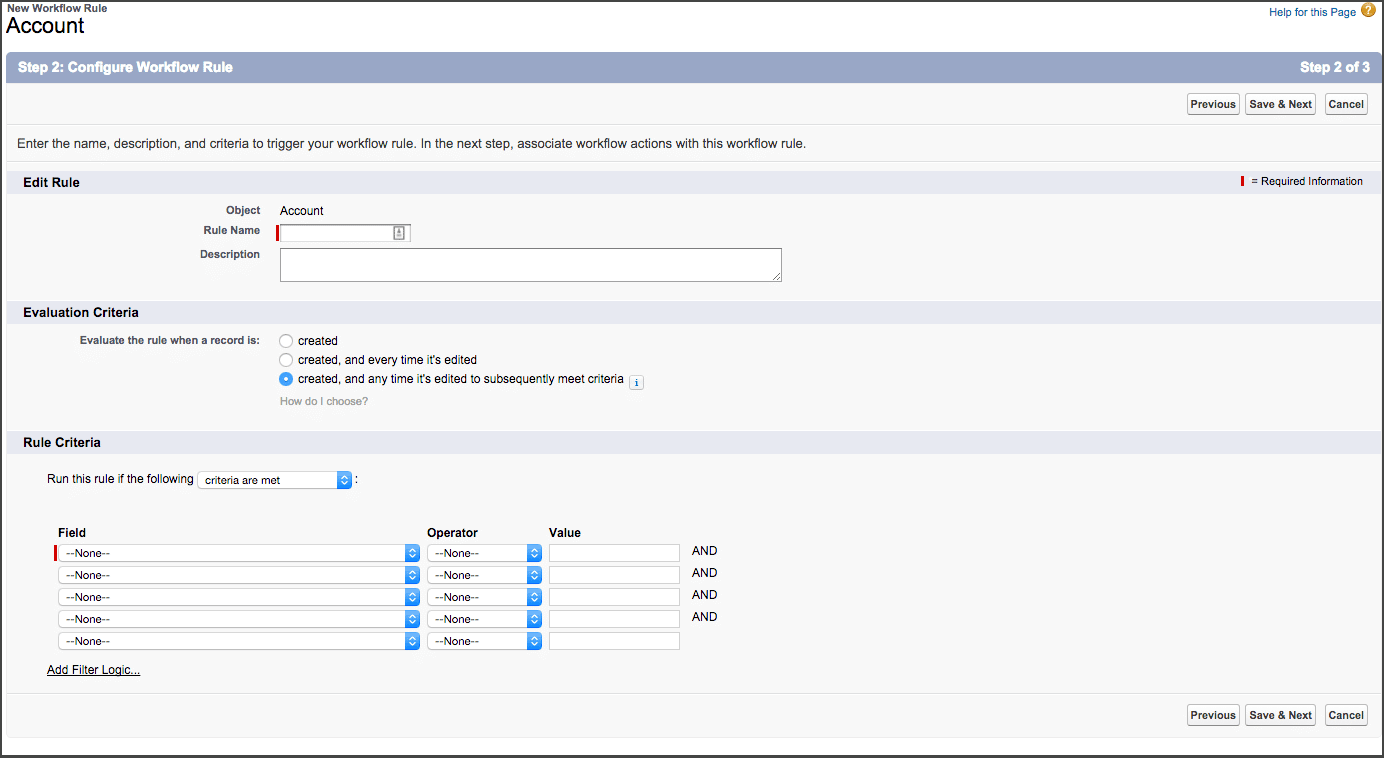
A workflow is made up of two things: Criteria (“if [blank] happens”) and Actions (“do [blank]”). First choose the object to which you want the rule to apply (you can choose from a range of standard and custom objects). Then decide when you want your criteria to be evaluated.
- When created
- When created, and then every time it’s edited
- When created, and then any time it’s edited to subsequently meet criteria (basically the rule is evaluated when a record is created, and when a record that doesn’t meet criteria is edited to meet criteria)
After that, enter your criteria and action(s):

Next, specify what actions you’d like to take:

Ta-da! Now, the next time your criteria is met, your selected activity (e.g., email alert, new outbound message, etc.) will take place.
Building Processes With Process Builder
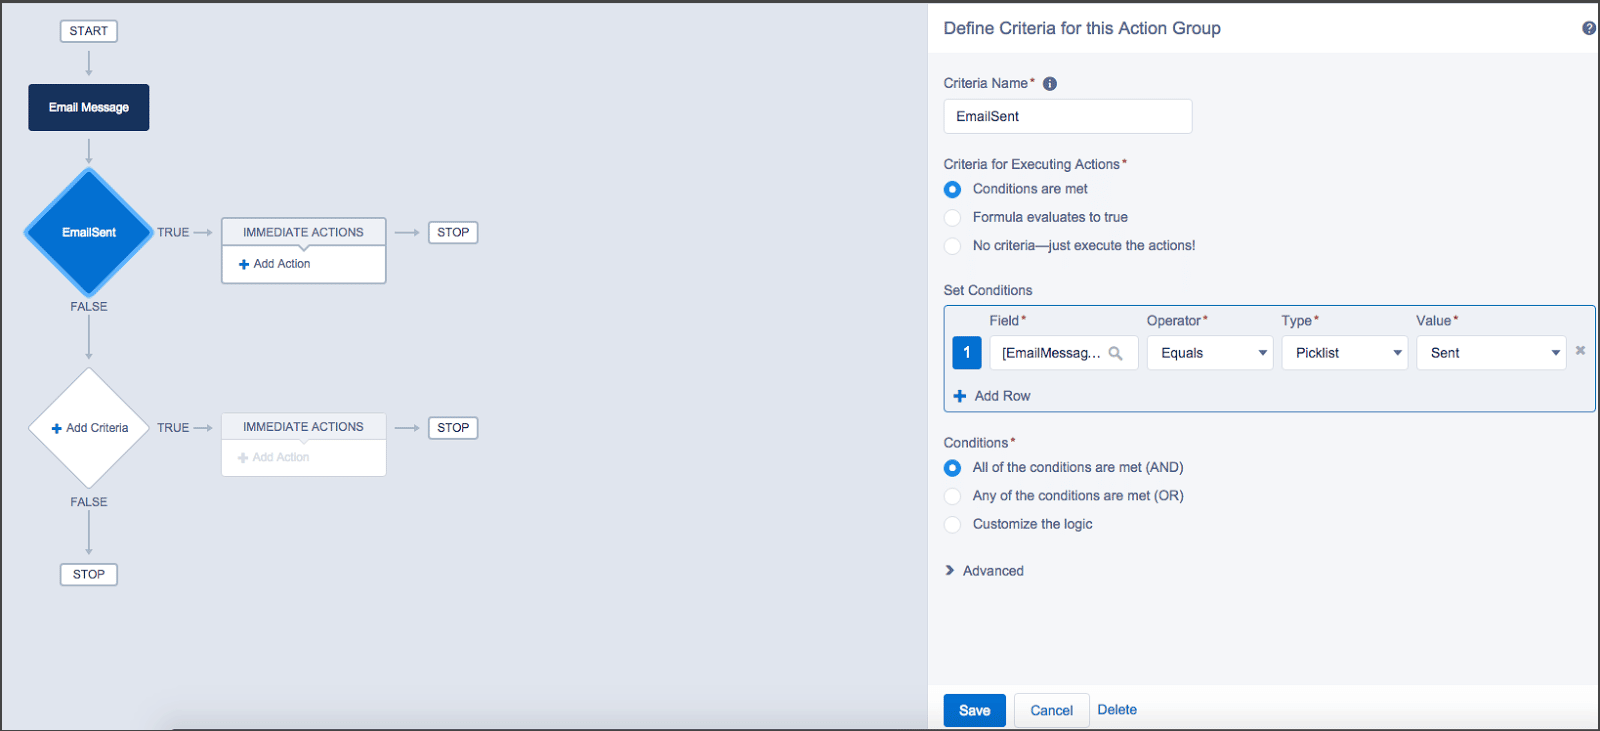
Process Builder is a tool to build multiple workflows for one specific object in one location. Again, you must choose the object on which you want the process to take place. Then decide when you want the process to execute. Define your criteria and specify/customize the logic of the conditions (criteria):

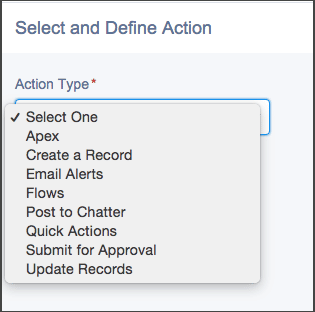
Select an action:

Here, you have more options for actions than a workflow. Choose one and continue. Salesforce also enables you to make time-dependent actions fire in a specified amount of time after the criteria is met.
Will You Go With the Flow?
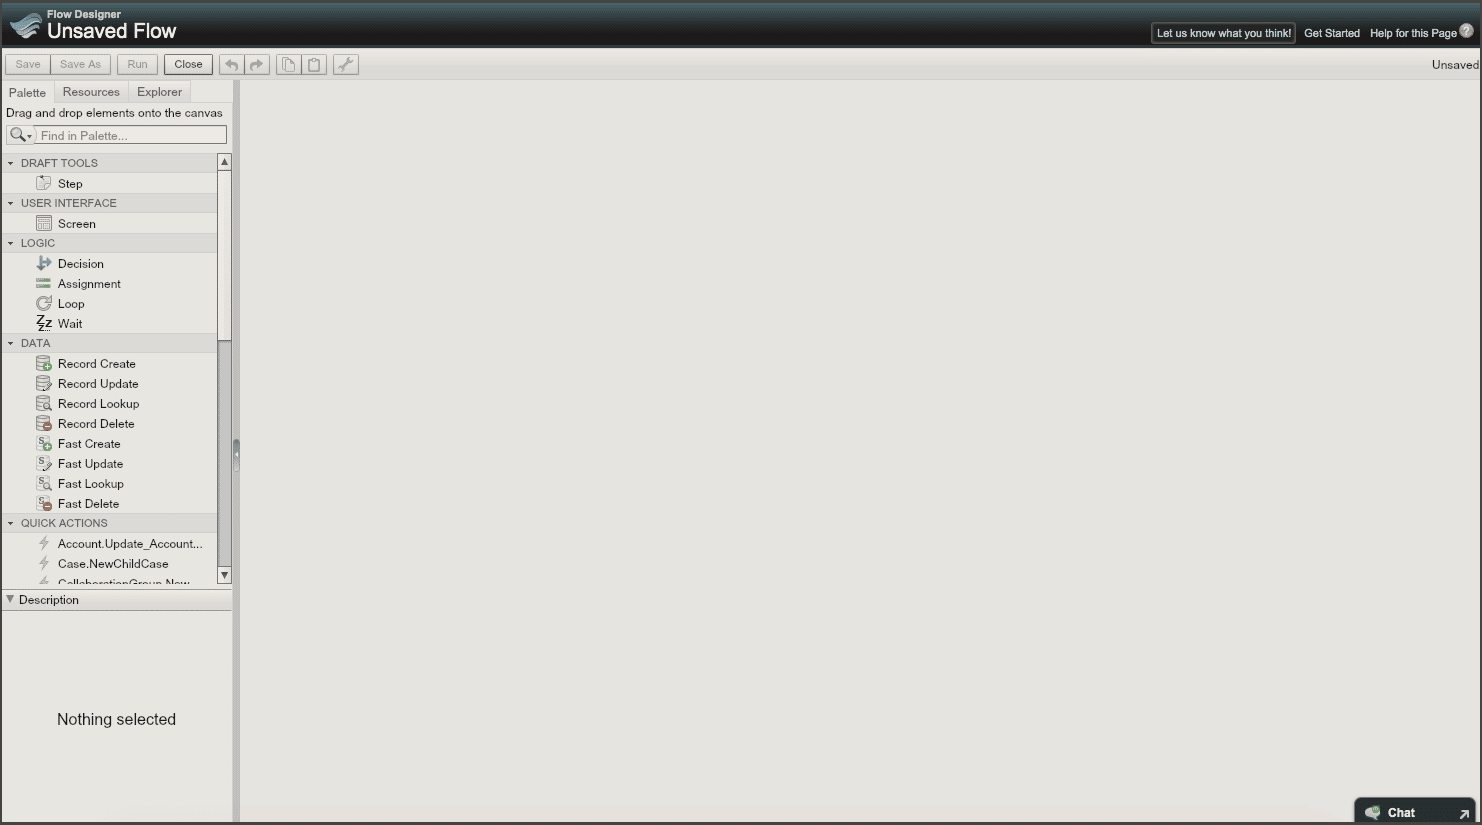
Visual Workflow (also known as Flow) is the happy medium between clicks and code. If you want to make Salesforce do most of the leg work, and then jump in and add some customizations of your own, Visual Workflow is for you! By utilizing this tool, you still “click before code” and save yourself a bunch of time. One of the best features of Visual Workflow is the drag-and-drop method. You can also interact with any of the data, drawing out the process and logic. Flow gives you much more freedom when it comes to supported actions; you can call Apex code, create or delete records, launch another flow, post to Chatter, send email, submit for approval, and–best of all–update any record. This process can be triggered by a number of actions: when a user clicks a button or link or accesses a custom tab, when a process starts, or when an Apex code is called. Visual Workflow can help you extend logic with Apex (by means of an Apex plug-in or a callout), and customize the user interface (UI) to ensure that it blends in with the rest of the Salesforce environment. The possibilities are endless with Flow.

Don’t Be So Quick To Pull The Trigger!
Save Triggers for last, because this is where you code imperatively–that’s the hardcore code–in order to cause a desired action to happen. This can be very time-consuming, because once you write the trigger, you also have to write test classes to ensure the quality of your creation. There are a few IDE available to aid you in creating triggers and further develop your org. Personally, I prefer either Sublime Text with the MavensMate plugin or the regular Salesforce.com IDE, but that’s like telling you to choose Android over Apple–it’s really up to you.


Tying It All Together in a Real Life Situation
I was faced with this situation not too long ago: I needed to update a checkbox and lead status. How did I do it? First, I created the checkbox–that was the easy part. Next, I made a workflow rule to check if the Boolean checkbox was true and then update the lead status to a picklist value that I specified. Then, I created a trigger and a corresponding test class (triggers need at least 75% coverage to be accepted by Salesforce). Once my trigger passed coverage–always develop in a sandbox first!–I deployed my creations to the production environment via outbound and inbound change sets.
Don’t Just Do It, Make a Plan First
Now you know a few tools that are available in Salesforce that are designed to help you code declaratively. So how do you know when to “click before code”? You have to analyze the capabilities of the tools at your disposal–use Google!–and then take into consideration the relationships involved. Don’t write off code altogether–you’ll still need to do it here and there–but don’t jump into hardcore code when you can simply click.
Salesforce is designed to make your life easier, so don’t complicate it by coding unnecessarily. It’s a good idea to do a little research and come up with a plan before you decide to click or code first. You’ll find that many of the tools at hand make “the cloud” (Salesforce.com) think, not you. Save your company and yourself in a lot of ways: Click Before Code.


